
CREATING A
DYNAMIC CAPE FOR VICKI
Poser 6 used but should work in Poser 5
Zip Pose File - unzip into your Pose Library
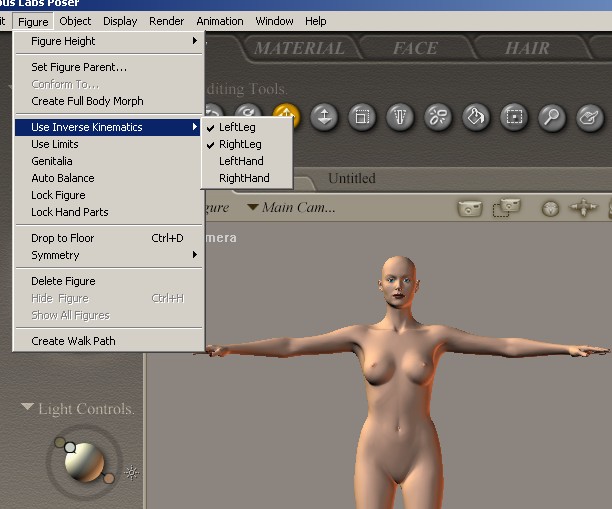
First off, load Vicki 3 and remove the kinematics by selecting the check mark for each leg.
Go over to Window and choose the Joint Editor - make sure the body is
highlighted (selected)
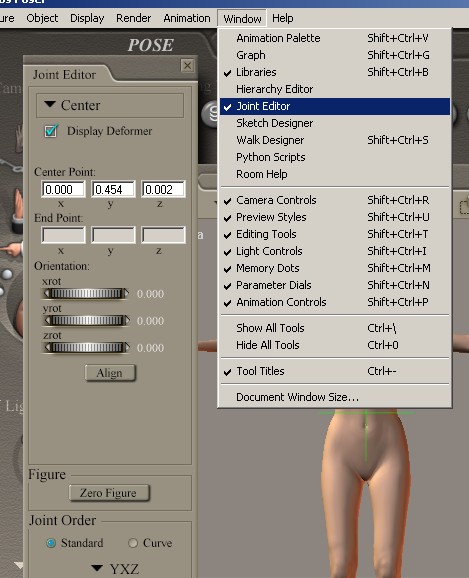
Go down to Figure - Zero Figure and select it and the figure will change slightly...that's good! Just click on the little x to make the Join Editor Box vanish! Here, you might want to check that she is standing on the floor and not below it - with Vicki/body still selected, click on Figure/Drop To Floor.
We'll add her texture and hair later but right now, we just want
to give her a beautiful cape thingee ![]()
Go into Props and Select Primatives - then select the Square Hi Res. We want to change the dimension of the square so it will not be so wide on Vicki. With the dials, change the X Scale to 70. The prop is at Vicki's feet, but we need to raise it above her head. This is the hardest part because the square has no thickness, it is sometimes difficult to see. You could add a colour which might help you a little.
With the plane selected, using the Y Trans Dial, turn it to the right and raise the plane up over Vicki's head. When you are satisfied, release the dial. Mine is at 75.130 so it will be around that figure approximately.
See that funny little thing down at the bottom of the Poser
screen? That is you Animation Control Tab -

click it and it will expand. We want to move the bottom numbers to 30 so either do this by using the little arrow or by using the second button on the lower left which begins First Frame then End Frame, which takes you to end - in this case 30.
Now we want to pose Vicki the way she should look with the cloth
draped on her. Go to wherever you installed the Pose included with this
tutorial - or use one of your own - and select it. We now have Vicki posed
and waiting ![]()
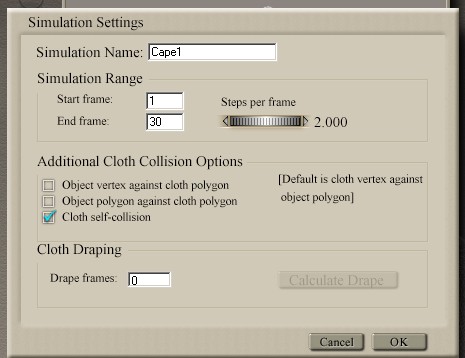
With Vicki still selected, and checking to see that you are still on Frame 30, (use the inverted arrow to get over to Frame 30) click on Cloth and you will now find yourself in the Cloth Room with lots of buttons and strange names. Do not panic! We will make use of only a few. The first button to press is under #2 Cloth - New Simulation - click on it and you get a small menu.
We don't have to do too much in this menu unless you want to give your simulation a name - if so, do that now BUT the important thing to check here is Cloth self-collision, which is very important as I will show you at the end of this tutorial. Click OK.
Now click on Clothify and you will get another small menu like this - use the
arrow if you need to, to select the ClothPane1.
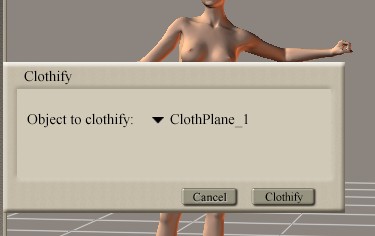
Click Clothify.
You're doing terrific!!! Now click on Collide Against. You'll be in another small menu.
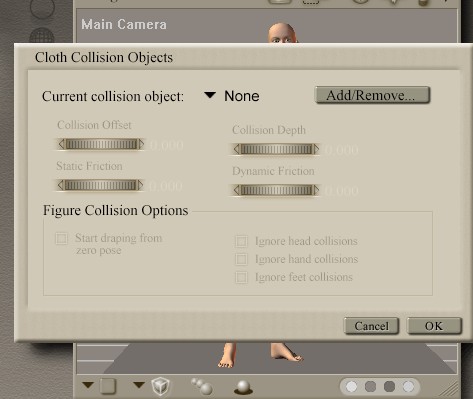
This is where we set up Poser to let it know what we what the material (in this case the plane is our cape) to collide against and not go through - click on the Add/Remove button.
Now you will get the Heirarchy Section which shows everything that is on your screen in minute details..haha. Click on Figure 1 (Vicki) and Poser places little x's in all her appropriate boxes. Scroll down to the bottom of your list here and you will see two items we don't want. Untick the GoalCenterOfMass and CenterOfMass at the very bottom - everything else should have an x.

We're almost ready now for the action!!
One final menu - Cloth Collision Objects.
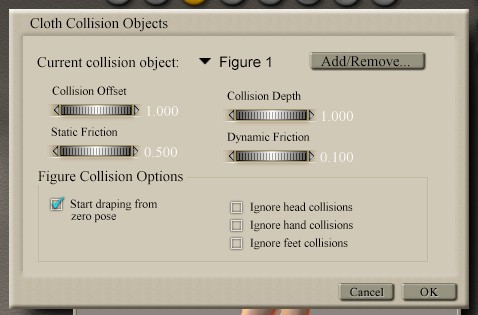
Leave the check beside Start draping from zero pose and check all three of the Ignore collisions. The feet probably won't matter in this case but if you use another pose where she is seated, it would. Press OK and we are finally ready to proceed.
Move over to #4 on the top right of your Cloth Room - first button - Calculate Simulation and select it.
Poser will take a moment or two and then you will see:

As the frames progress, you can see the cloth coming down over Vicki's head until finally at Frame 30, it is all done.
Move into the Pose Room, where you can add texture to Vicki and the cloth, change her expression, give her hair, etc. If you want to do that beforehand, you can also.
I save mine as a pz3 or pzz in Poser 6 - I can't verify how to save the finished prop but I would think you save it, along with the pose.
I hope this has helped - hope it's all clear as glass! It's fun but I am just a learner too.
If you did not check the Cloth Self-collision box in Simulation Settings, your cloth will look like this - as you can plainly see, the back of the cloth collides with the front in some areas, leaving an undesirable cape.
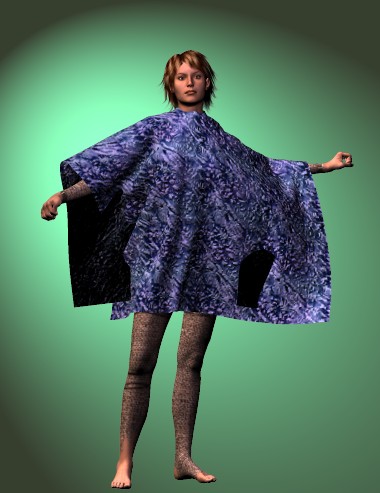
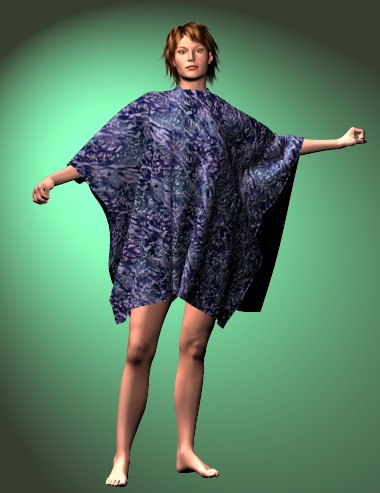
If you checked the Cloth Self-collision, you will have a lovely cape...if you want a longer cape, all you need do next time, is increase the Y Scale before you begin.
Here's my finished cape, and I hope you've enjoyed this tutorial!
Have fun!!
![]()
Irene
Visitors since April 19/05