|
Let's
Make A Gem
In
PhotoImpact 5
Okay,
let's learn how to create a beautiful gem in this wonderful
program. If you have used another graphic program, PI takes
a little getting used-to but once you become comfortable with it,
the sky really is the limit!
Let's
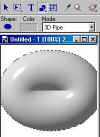
begin! Open a new file, 200 x 200 pixels. Now, Click
on the Path Drawing Tool, Click Shape, Select Ellipse and we'll
start with 3D round. Okay...your image should now look like
this:
 (Click on picture for full size view)
Now
we want to change this from 3D round to 3D Pipe but DON'T PANIC!
It will look quite large but that is okay. It will look like
a big mound of dough but now we will use the Border lever and push
is back until it goes from this to this: To do this, select The
Path Drawing Tool first then change from 3d Round to 3d Pipe.
 before
 |

after |
 |
Now,
go to the Easy Pallette and Select the Galleries Icon (it
looks like a house) and highlight Materials then
double-click on Materials to open it up so you can see all
the Materials. |
 |
Let's
choose Metallic and for this demo, I have selected Copper
2 by double-clicking it and then my gray 3d pipe image is
now copper! |
Okay,
looks pretty good so far right? The Undo Option under Edit
is very good! You can try other metallic colours here right
now if you like, after each one, just right click on the image and
select undo...this will help you in discovering which one you want
to use. Also you could test out Reflections, Bumps,
Shadings, Textures and even Colours...if you don't like it, just
undo OR create a duplicate just for experimenting on by pressing
Control and D and take a few moments and live dangerously
(giggle!) When you're ready, let's move on.
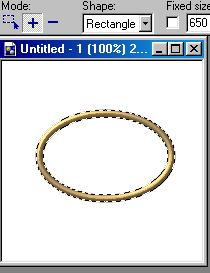
Now
it's time to create our gem and we are going to use what we
already have by Copying it to the Clipboard and then Pasting it
back into our image as an Object then, using the Pick Tool (the
arrow), we will move the new object on top of the original
one. Now select The Path Drawing Tool again, and Select 3D
Chisel....move the Border Lever up. Go to the Easy Pallette
and Select Plastic and go to the top and select Remove to change
the image to grey from copper.
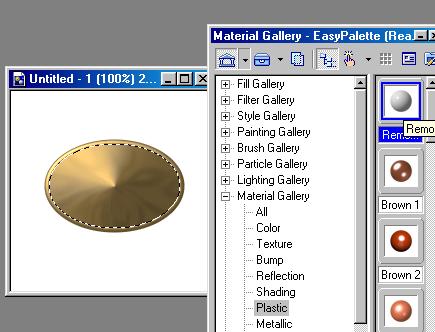
Let's
now give our gem some colour! Select Colour on the Easy
Pallette and choose one that you like. I chose Indigo by
double-clicking. Then, we are going to copy this to the
clipboard and paste it back into our image as an object.
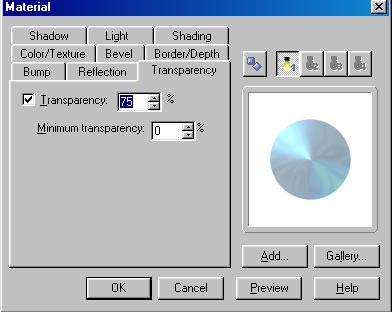
Now, we are going to make it transparent so select Path Drawing
Tool, then look over to the right for the Material Icon, like
this:

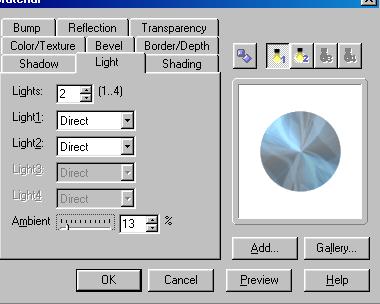
Select
Material Icon and a drop-down box appears. Look for
Transparency Tab and select it. Check Transparency and make it 75%
then press OK.
Now
go to the Easy Pallette and Select Reflection under Materials - I
chose Artistic. If you wish to use something else, test it
by using the undo feature until you get what you want. You
can leave it at this or we could also add a texture but for now,
let's leave it. You can change the lighting on it too which
affects how it will look. To test that out, go back to the
Materials Icon at the top (remember to select Path Drawing Mode!)
and select Light. Here, I have added another light so there
is 2, both direct. If you change it to Spotlight, the image
will darken and you can also play with the Ambient...be daring!
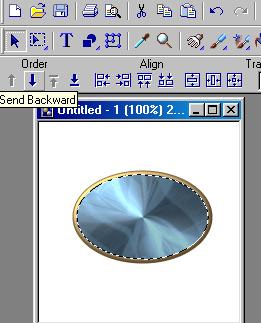
When
you have achieved the look you want, move the transparent image
directly over the original ellipse then select your Pick Tool (the
arrow) and under this, you will see up and down arrows. We
want to send the ellipses 'under' the copper piping so select the
down arrow and press it twice which will send the images to the
back.
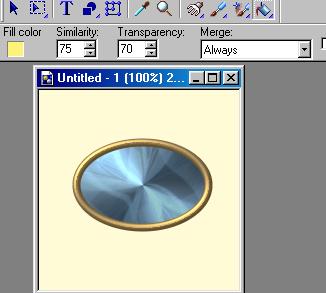
Okay!
Here's my finished image which I deselected by clicking on the
white background and then I used the paint tool to add a coloured
background.
If
you wish to have a transparent gem, then go to the Layer Option in
the Easy Pallete and while pressing Shift Key, also press each
image in layer mode until you have selected all of them.
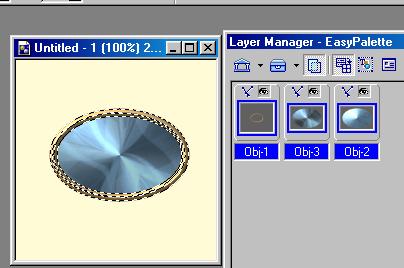
Now
right click on the image and choose Combine As Single
Object. Crop the image now to remove most of the outer part
then:
Go
to Web/Image Optimizer/Selected Objects Only and save file as a
gif. When it is opened, it will be transparent. How'd
we do?
Here,
using the same image, I have created 3 different gems. The
red one, by changing the gem into 3D Round then changing the
colour to red and adding a Reflection. I then changed to
Glass Material and chose green and used Texture for the metallic
pipe. The blue one is Indigo with a 3D Chisel plus a
Reflection. These are fun to experiment with so go for it!
That's
a wrap and I hope you've enjoyed it! Any comments or
omissions, please feel free to write
me
|


