Let's Make A Gem - Lesson 2 In PhotoImpact 5 Let's try creating another gem and this time we'll learn how to save it so that it can be used again, over and over, changing it or adding to it...let's begin! Open a New Image, 300 x 300 pixels. I like to work on a big canvas as you can always resize but for me, it just makes it easier to see exactly what I am doing. For this demonstration, I have used the Font called Wellsley. You may download it here or, use something similar that you might already have. UPDATE MAY 6/00 One thing I neglected to add here and now must hasten to correct. When you create an image from a Ding or Font, please ensure that you change it into an object or else it will not work correctly if you edit it. So while the ding or font is still highlighted on your background, go to Object/Convert Object Type/From Text To Path. Now it is an object like other items in your image and will behave in the same manner. I select my Path Tool first to change the colour to grey, which I do by going to the Easy Pallette, selecting Plastic, then double-clicking Remove - this ensures we have an object free of any apptitudes. Now, I select Metallics then double-click Copper 6. Select Text Tool, and select Wellsley for your Font, size 150. When the Text Entry Box opens, select Capital S then press OK.
Now, we
need to add our gem...I selected an ellipse, but you could choose the
shape you wish, or perhaps try several until you find the one you like the
best. The image is large enough that you can create the ellipse on
it so go ahead. Now go to the Easy Pallette, and to Plastic, then
Remove so that your ellipse is GREY. Then, go down in Plastic to
Brown 3 and double-click. Go up to the MATERIAL Icon Okay, it's
beginning to actually look like we may create something pretty nice,
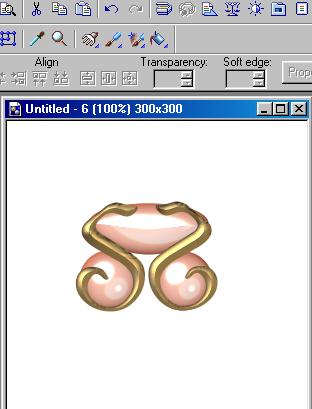
eh? Make sure your ellipse is selected, then using the Pick
Tool ( the arrow) move the ellipse in between the 2 S's so it looks
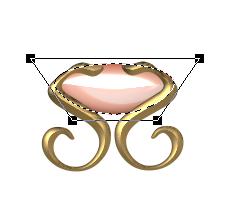
like this: Using your
Pick Tool again (arrow), click on the down arrow twice, which sends the
ellipse to the back. Now, select the Transform Tool Here's what it might look like:
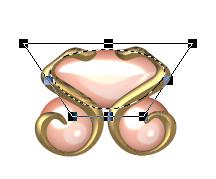
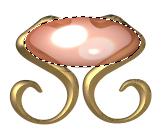
When it looks good to you, delect it by clicking anywhere on the image other than the ellipse. Let's add a smaller gem on the two curliques at the bottom. Ensuring that you are still in Path Mode, choose the round shape and create it, then with the Pick Tool, move it onto the bottom and press twice on the down arrow to move it behind. While it is still selected, Copy it then Paste it as an object and with your Pick Tool, moved it to the other corner and send it back as well. It should now look like this:
Looking at it, I decided the top gem needed to be pulled down a little at the bottom so using Transform Tool, I clicked on the centre 'node' and pulled it down like this:
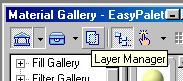
Okay, to
save this for future images, here's what you need to do. Go to Easy
Pallette and select the Layer Manager Hold the Shift Key and select all the items, then right-click on your image and select GROUP. Do not select Combine As Single Image because that command cannot be undone. When you have Grouped the image, with your Pick Tool, drag the image over to the Easy Pallette. A box will open warning that your image will be combined - select YES, and another box will open called Add To Easy Pallette. Give your item a name and it will then be added to the Easy Pallette so that you may use it over and over. All you have to do when you wish to use it is, drag it into the workspace, right click to UNGROUP it, then you are free to use any of the items within it, change colours, etc. Extremely handy! So...we now have our little gem design. What can we do with it? That will be the next lesson so stay tuned! Remember until then, you can create lots of interesting designs with fonts and your imagination!
|


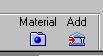 and select it, then choose Transparency on the Material Pull Down Menu and
set it to 74%. Your ellipse should now look like this:
and select it, then choose Transparency on the Material Pull Down Menu and
set it to 74%. Your ellipse should now look like this: 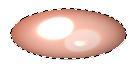
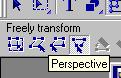 and we'll change the shape of the ellipse. By pulling on the right
top corner, you enlarge the top portion while pulling on the bottom
corner, you pull it in. Experiment with both - REMEMBER you can use
the Undo to revert back to its original look OR, if you prefer, you can
press Control-d, which gives you a duplicate copy upon which you can
experiment with.
and we'll change the shape of the ellipse. By pulling on the right
top corner, you enlarge the top portion while pulling on the bottom
corner, you pull it in. Experiment with both - REMEMBER you can use
the Undo to revert back to its original look OR, if you prefer, you can
press Control-d, which gives you a duplicate copy upon which you can
experiment with.