|
GRANDFATHER'S
CLOCK
|

|
My
grandfather's clock was too large for the shelf,
So it stood ninety years on the floor.
It was taller by half, than the old man himself,
Though it weighed not a pennyweight more.
It was bought on the morn
Of the day that he was born,
And was always his treasure and pride.
But it stopped short, never to go again,
When the old man died.
|

|
This
tutorial was written some time ago and the links to the DecoDivider Font
and the Fleuron Font as no longer active. I also had to find the
PSP Tutorial as the link had changed - there you will also find the
fonts needed.
I've
always loved Grandfather clocks and when I saw a tutorial
for PSP, I fell in love with it. Jo created it and I am
converting it for Photo Impact with her permission. Thanks for
your graciousness Jo!
There
are lots of images in this tutorial so please be patient while it loads.
To see images full-size, just click on the thumbnail. 
You'll
find the DecoDivider Font as well as the Fleuron Font here
 |
Let's
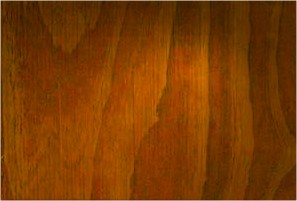
begin by first copying the image on the left to your hard drive.
Open Photo Impact and open a new file, white background, 500 x
500. I also found it extremely helpful for this tutorial
to turn on both the Grid and the Ruler.
With
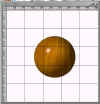
the Path Drawing Tool, 3D, Circle, draw a circle approx.
250 x 250. Select Material from the Attributes Tool Bar
then Color/Texture and click File, this will browse your hard
drive and you can select where you saved the wood image on the
left which is called walnut-ic.jpg
Having
found it, select it, and your circle is now a walnut-covered
one! Before you leave Materials Drop Down Panel, select
ADD and this will save your circle in My Gallery so you will
know later where to find it as we will make good use of it for
this tutorial 
|
|


|
Once
you have saved your circle, you can delete it from the
workspace.
Now the hard work begins. Although we don't have to cut
the wood, we do have to shape it, so bear with me as the results
are well worth it.
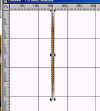
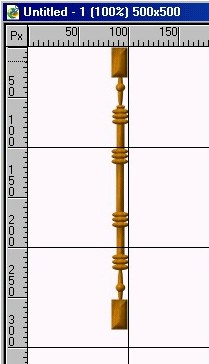
There
are several small pieces to create so let's start with the
moldings. For this, I used an oval, then shaped it like a
toothpick, so it is about 325 long. I tend to create
large then I can resize.
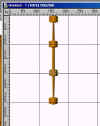
Draw
an oval with the Path Drawing Tool, about 40 pixels across, then
duplicate it two times and place them one under the other. I
grouped them together then duplicated them three times.
Click on the picture on the left to see it full size. When
you have the dowels placed where you like them, we will then
create the top and bottom pieces. It's a good idea to
Group together pieces as we move along, which makes them easier
to move around so let's group the entire dowelling now.
Deselect.
Draw a
small oval lengthwise then draw a circle and place it in the
middle of the oval. Place this dowel on top of your
finished one, then duplicate it and place it on the bottom.
Now create a small rectangle to place at the top and bottom.
Group them to the dowel as well. You will probably have to
resize this quite a bit now. Mine is now 225. Group
it all together then use the grid lines to make sure everything
is lined up correctly before duplicating. Now we have our
two end pieces.
|

 |
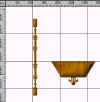
Our
next piece in the bottom of the clock. Draw a rectangle
(your wood should still be the material selected) Use the
Perspective Tool on the bottom of the rectangle to make it
approximately this size. Now you need to use the Fleurons font,
size 75, Grey, the letter Q. Convert it right away:
Object/Convert Object Type/from text to path. In Easy
Pallette, go to the end of Galleries (1st on left) and select
your Wood Material Circle and the fleuron changes! Flip it
vertical and then place it on the bottom center of the
rectangle.
Now
take a break and get up and stretch your legs a bit! 
|

 |
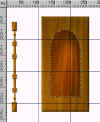
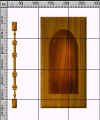
Move
your pieces off to the side of the background so you have room
to work. Create a rectangle (wood should still be
selected) 150 wide by 300 high - reduce the border to 9.
This is the back of the clock. Now we have to make it look
as though there is an opening so to do this, I used the
arch 3 shape. When you have it created, change it to 2D to
flatten it and then convert it to an image and burn it anyway
you wish - I burned it around the edges and down at the bottom..
Images on the left show before and after burn. |
|


|
Next
comes the bottom facing. I opened a new image to do this.
Create a 2D Rectangle and a 2D Arch 3 - center the arch in the
rectangle as picture shows.
Now
draw a white 2D circle and place it on the upper left side -
duplicate the circle and place it on the right side.
Select
the Fleuron, letter Q, white, size 100, 2D, and flip it vertical
and place it in the top centre. Now, merge all! Select
Edit/Trace/Trace Image; accept the settings. Change
Horizontal Deform to 3D, Click on your Wood Material in Easy
Pallette and then bring down the border to about 7. Way to
go!!! 
|
Next
|

