SIMPLE DISTRIBUTION MAPPING IN VUE 5 INFINITE
This is just a simple tutorial to get you acquainted with the distribution mapping function. Once you're familiar with it, you can make some outstanding terrains.
As this is a
basic tutorial I may talk about things you already know about ~ just pretend you
are a newbie ![]() or skip over the parts you know.
or skip over the parts you know.
Okay, let's begin by adding a terrain...now double-click the terrain in your work area which will take you to the Terrain Editor:
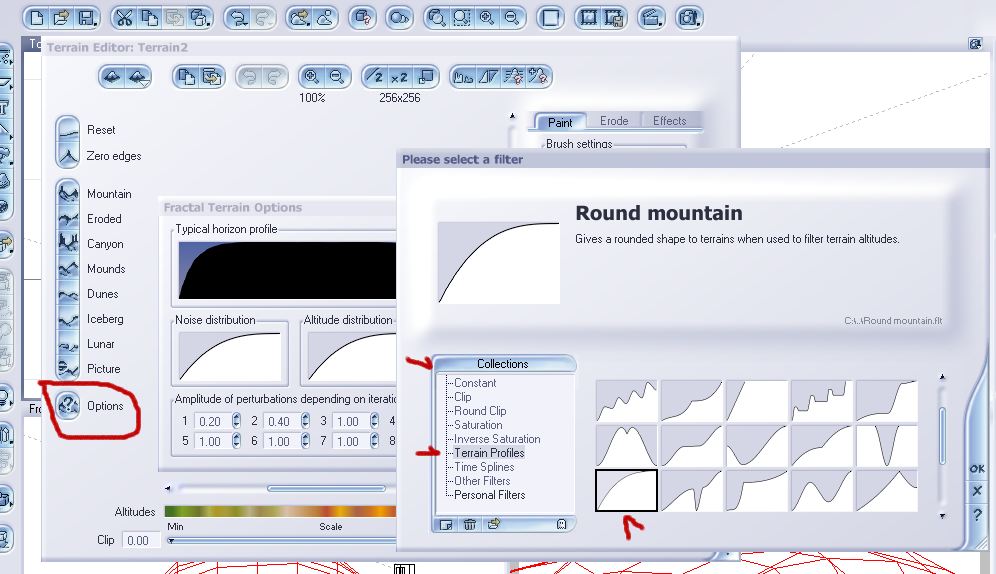
Click on Options which will take you into the Terrain Options - click on Noise Distribution which should take you into the Filter Menu - click on Terrain Filters and select Round Mountain. Do the same thing for the Altitude Distribution.
Your terrain should now look like this:
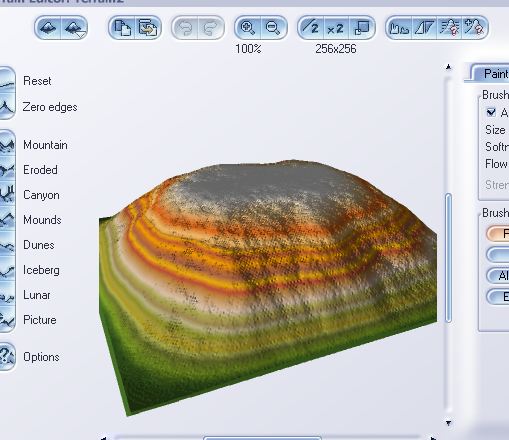
Okay, we now have our terrain so go into your work area and lets decrease the height of our terrain as it is too much of a hill this way.

You can either go into your graphics program to create our distribution map or you can right-click and save this one for your use: Save it anywhere on your harddrive - I save mine under Distribution Maps.
 |
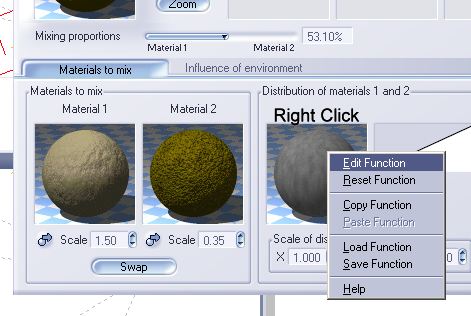
Double-click on the sphere in your Object Panel which will bring up the Material Menu - select Natural from the Landscape Collection:
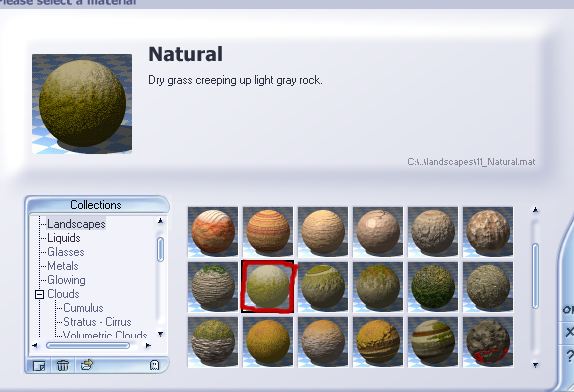
Material One will be our path and Material Two will be the rest of the terrain or grassy area.
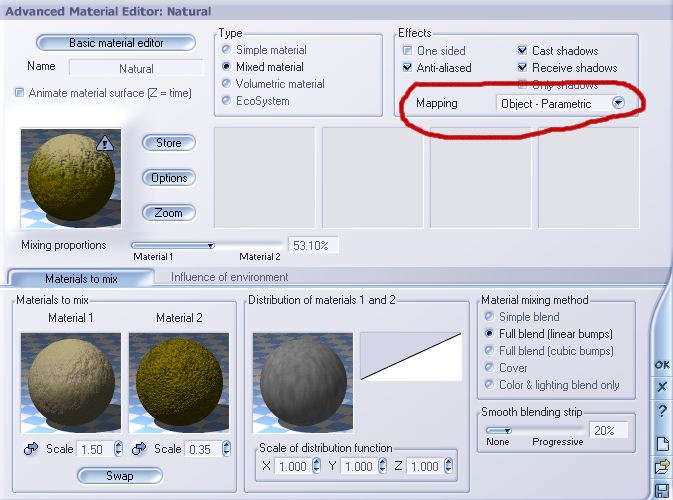
Back in the Material Editor, change the Mapping to Object Parametric. This is very important!
Down below that you see Distribution of Materials 1 and 2 and this is where we will add our Distribution Map so right click on the sphere, and select Edit Function:
Oh..oh!
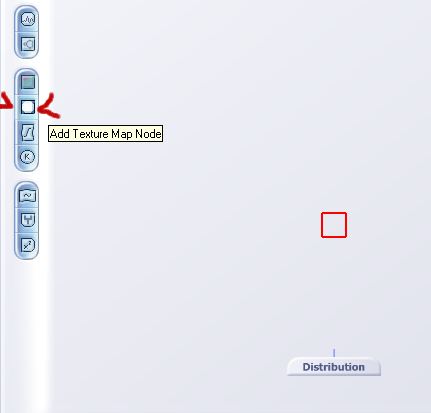
There's already Distribution Maps here...that's okay..if you find them, delete
them as we are changing the Distribution of these materials with our path map,
so highlight each of the items with your mouse and press delete...get rid of
them all! You should now have a clean area with Distribution Tab and a
little stick protruding from it. Fear not!! ![]()
Click anywhere on the blank form until you have a little red square - not scoot over to the left side and select the white box (Add Texture Map Node).
Down at the bottom, you will see the Texture Map Mode Area - click on the area and browse to where you saved either the pathway image above or the one you created yourself. Select it and you will see a picture of it in the preview screen.
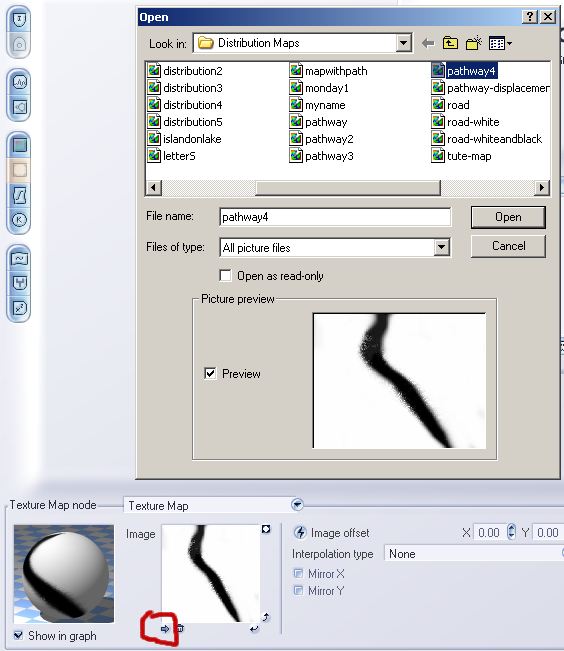
Click the little curved arrow either right or left twice to rotate the image 180 degrees.
NOW, AND THIS IS IMPORTANT 'cause if you forget it, it won't look right. If when you render, the path is wrong, check and rotate!
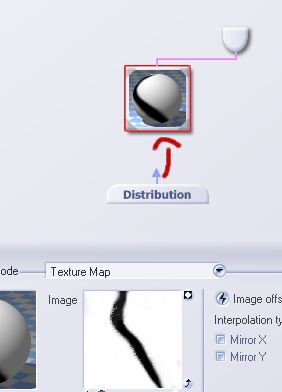
Something else that is IMPORTANT ~ you must connect the Distribution Tab to the texture map. Do this by pulling up the arrow into the map. I've forgotten this more times than I care to remember so develop a routine of doing it. If you forget it, and you leave this menu, you will have to right-click on the Edit Function and repeat.
Okay, click on OK and we are back in the Material Editor. A few things left to do. Move the dial on the Smooth Blending Strip down on the lower right to about 85%. You can change this later if you want to adjust it. Click on Material 1 and change the Mapping to Parametric - do the same for Material 2. (Same as Image 5)
Now let's render and see what it looks like.
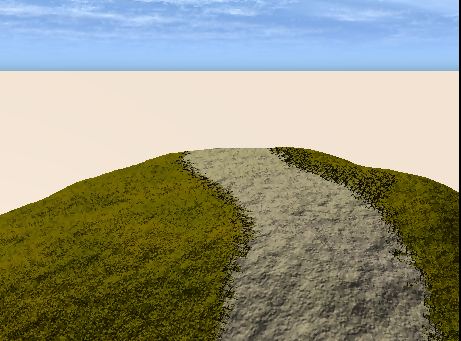
You can always check it by changing from the Main Camera to the Top Camera which gives you a good view of the entire path, if you raise the camera up and change the Focus to around 20.
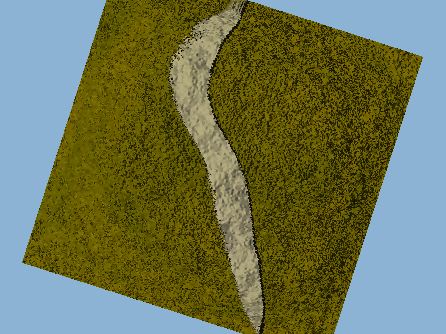
This was not the best textures to use here - if I was doing this again, I would use my own but this is just a quide to get you started 'on the path'. Sorry for the pun but couldn't resist.
From here, if you go into each Material Mat, you can change them to Ecosystems and add items.
I hope you enjoyed this tutorial! Love to see your results.
Irene aka
Irishmiss or Irish
February/2006
Please check my other Vue Tutorials:
Since February
2006